Back in part 1, we covered the concept art for the project’s North African dieselpunk building style as well as the street layout for the medina itself. Since then, we’ve begun building the components in 3D, starting with David Alvarez’ outstanding job on the buildings themselves:
Models by David Alvarez
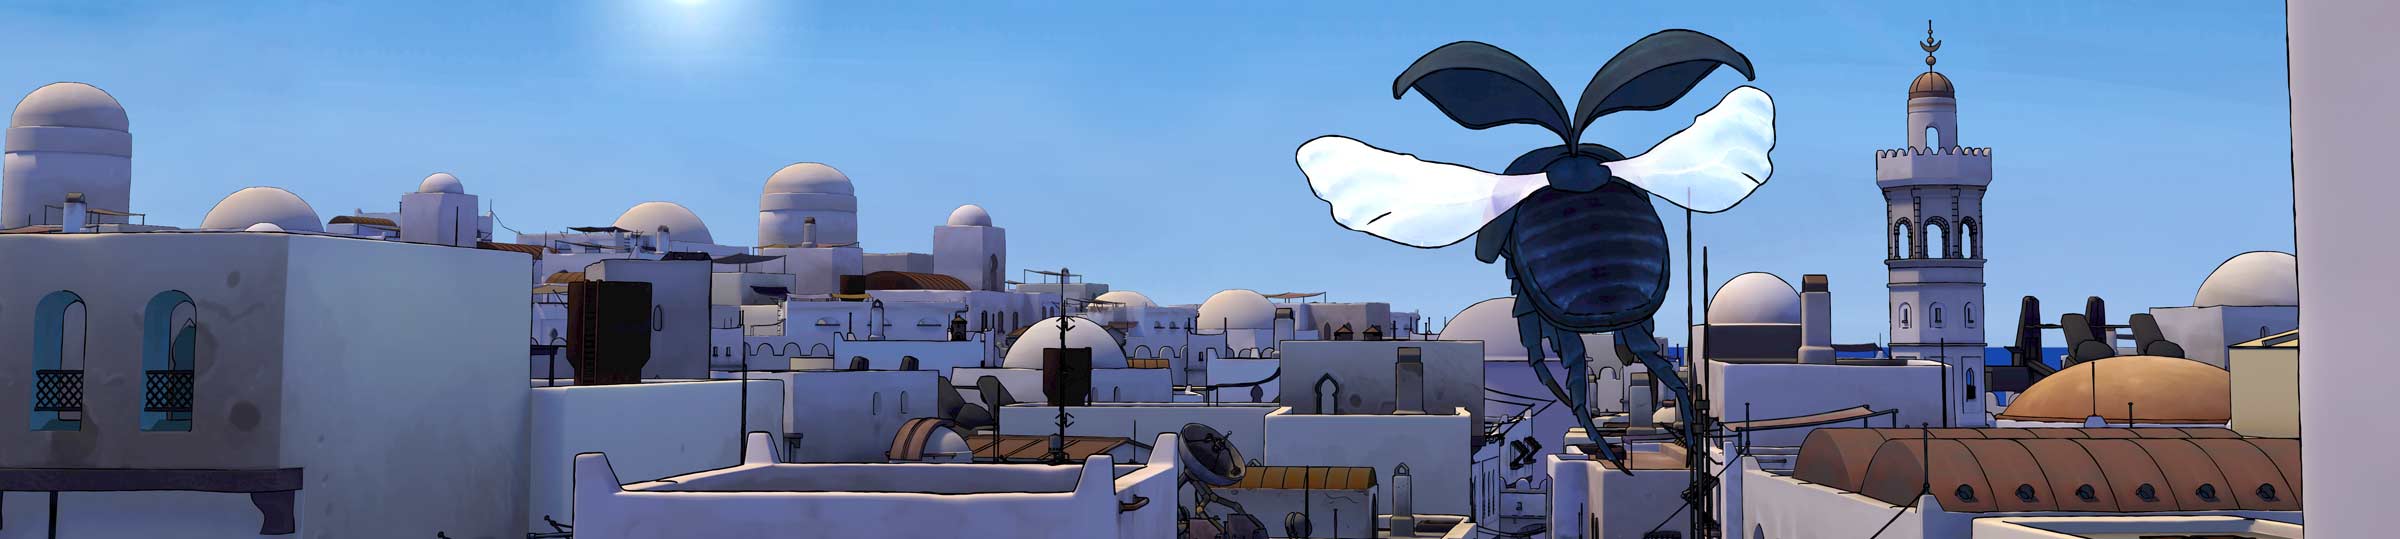
These buildings and many more have been sprawled across the map to form the winding streets and narrow alleys of the medina. As you can see in the render below, we’re gradually replacing low-poly structures with high-poly ones as we build up the city.
The Scarab is only a vehicle, not a character, but in many ways it’s the star of the show. Certainly we’d want it featured prominently on the poster. So getting its “look” just right would be crucial. We knew we’d be spending a lot of time and effort on the modeling phase.
Things kicked off with a bang when I got an e-mail from Michael Marcondes, a prominent C4D artist who had been following the project. He offered to do the Scarab modeling himself, as the basis of a surface modeling tutorial he was developing. We jumped at the chance, and the resulting model was a marvel:
Model by Michael Marcondes
Seriously, how wicked are those leg mechanisms?
Back to Basics
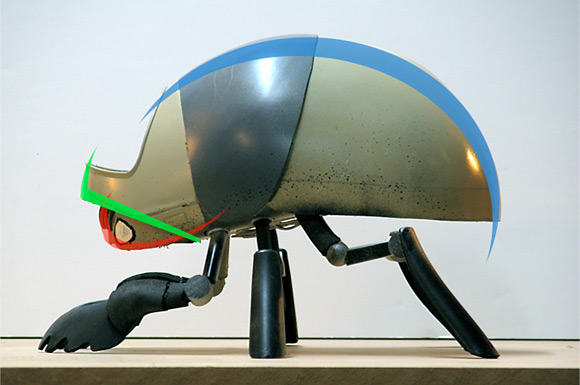
Once we examined the model from all angles, however, we realized we still had a ways to go. We’d lost a lot of the roundness, the compactness, of the original concept. The Scarab is supposed to have a hunched-over, defensive posture, and we needed the model to reflect that. Here was where our art director stepped in with one of his trademark diagrams. In the image below, he identifies the key lines that define the Scarab’s silhouette. If we could preserve those curves during the remodel, we’d be most of the way there.
Artwork by Matt Evans
To put it mildly, it took quite a few step-by-step revisions to get to the final model. I’ll spare you the hundreds of incremental screenshots, but here’s a brief rundown:
Rebuilt the rear shell into a single smooth unit
Reshaped the windshield for better visibility
Enlarged the grille and headlights to create a friendlier “face”
Resized and repositioned the legs to match the concept art
Recreated the inner leg rotators to improve range of motion
Built a large engine housing under the shell
Added new geometry to fill in the underside of the chassis
Reworked the exhaust vent at the back
Expanded and rounded the leg guards
Added an extra toe to the front feet
Created the full cockpit interior and seat
Modeled detailed controls for the cockpit dashboard
Added mounting points along the side and back for armor plating
Added shin plates and reinforced toe guards
(And that’s not even counting the battle armor!)
The Last Scarab
Was it worth it? Absolutely. The completed model beautifully captured the spirit of the original plastic Scarab while adding plentiful dieselpunk stylings and a crisp, comic-book flair.
Our star vehicle had arrived.
Model by Michael Marcondes, Sandi Dolšak, Magne Lauritzen, Steve Pointon